no image
Mac Os에서 Tmux 설치 & 사용법
Tmux(Terminal muliplexer)란? Tmux는 하나의 터미널 화면에서 여러개의 화면을 분할해 사용할 수 있게 해줍니다. 매번 새로운 터미널을 띄울필요 없이 작업할 수 있게 해줍니다. Tmux 설치 brew install tmux Tmux사용법 #새로운 session 생성 tmux new -s -n #session 이름 수정 ctrl + b, $ #session 종료는 tmux에서 exit #session 중단하기 ctrl + b, d #session 목록 보기 tmux ls #session 다시 시작 tmux attach -t #페이지 이동 alt + up, down #window 생성 ctrl + b, c #window 이름 수정 ctrl + b, , #window 종료 ctrl + d ..
2020.02.09
no image
Mac Os에서 ctags 설치 & 사용법
Ctags란? Ctags란 소스 파일에서 찾은 이름의 태그파일을 생성하는 도구입니다. 함수, 변수, 클래스 등을 인덱싱 하는데 사용할 수 있습니다. Ctags를 사용하면 vim과 같은 텍스트 편집기로 해당 함수를 빠르게 찾고 이동할 수 있습니다. Ctags 설치 brew install ctags brew를 이용해 ctags를 설치해 주도록 합니다. Ctags 사용법 #현재 디렉토리와 하위 디렉토리의 모든 파일을 대상으로 tags 생성 ctags -R * 명령어 실행후 폴더에 tags파일이 생성된 것을 확인할 수 있습니다. 이제 vim으로 분석하고자 소스코드를 열어서 분석하고자 하는 함수위에 커서를 올려두고 'Ctrl + ]'를 누르면 함수로 이동하게 됩니다. 다시 원래있던 곳으로 돌아오기 위해선 'Ctr..
2020.02.09
.vimrc 파일 저장(수정중)
"---------------------------------------------------------------------------------- "-- config "---------------------------------------------------------------------------------- " set UTF-8 encoding set enc=utf-8 set fenc=utf-8 set termencoding=utf-8 set hlsearch "highlight searching result set ignorecase "ignore Case sensitive when searching set history=1000 "store :cmd history set relativenum..
2020.02.09
no image
MacOs10.14에서 neovim과 coc.nvim으로 python 개발환경 만들기
기존 리눅스 개발환경에서는 ctags와 vi만을 사용했었습니단 이번에 파이썬을 공부하면서 더 나은(?) 개발환경을 구축해야겠다고 생각했습니다. 원래 계획은 vim을 사용해서 개발환경을 구축할 계획이었지만 자료를 찾아보던중 vim보다는 neovim을 이용해 개발환경을 구축하는 것이 더 나을 것이라 생각이들었습니다. neovim을 선택한 이유는 vim은 python 없이 vim을 컴파일 했을 경우 python을 사용하기 위해 다시 재컴파일 해야한다는 단점이 있었지만 neovim은 pip3 install neovim 처럼 불리된 형태로 설치할 수 있었기 때문입니다.(기존의 vim도 git에서 소스를 받아 python3옵션을 추가해 컴파일하면 python3를 사용가능합니다.) 또한 neovim은 버퍼로 터미널을..
2020.02.09
no image
[읽을 거리]Classes and Methods Cheat Sheet
Classes and Methods Cheat Sheet In the past few videos, we’ve seen how to define classes and methods in Python. Here, you’ll find a run-down of everything we’ve covered, so you can refer to it whenever you need a refresher. Defining classes and methods Classes and Instances Classes define the behavior of all instances of a specific class. Each variable of a specific class is an instance or objec..
2020.01.31
[읽을 거리]Dictionary Methods Cheat Sheet
Dictionary Methods Cheat Sheet Definition x = {key1:value1, key2:value2} Operations len(dictionary) - Returns the number of items in the dictionary for key in dictionary - Iterates over each key in the dictionary for key, value in dictionary.items() - Iterates over each key,value pair in the dictionary if key in dictionary - Checks whether the key is in the dictionary dictionary[key] - Accesses ..
2020.01.30
[읽을 거리]Lists and Tuples Operations Cheat Sheet
Lists and Tuples Operations Cheat Sheet Lists and tuples are both sequences, so they share a number of sequence operations. But, because lists are mutable, there are also a number of methods specific just to lists. This cheat sheet gives you a run down of the common operations first, and the list-specific operations second. Common sequence operations len(sequence) Returns the length of the seque..
2020.01.30
[읽을 거리] Formatting Strings Cheat Sheet
Formatting Strings Cheat Sheet Python offers different ways to format strings. In the video, we explained the format() method. In this reading, we'll highlight three different ways of formatting strings. For this course you only need to know the format() method. But on the internet, you might find any of the three, so it's a good idea to know that the others exist. Using the format() method "bas..
2020.01.29

Tmux(Terminal muliplexer)란?

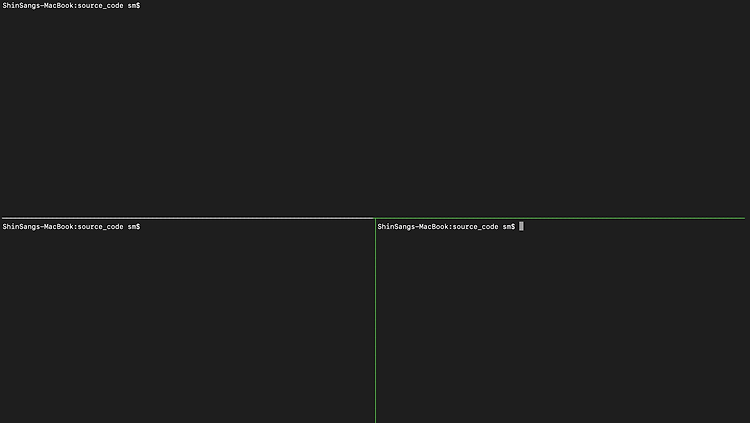
Tmux는 하나의 터미널 화면에서 여러개의 화면을 분할해 사용할 수 있게 해줍니다. 매번 새로운 터미널을 띄울필요 없이 작업할 수 있게 해줍니다. 


Tmux 설치

brew install tmux


Tmux사용법

#새로운 session 생성
tmux new -s <session_name> -n <window_name>

#session 이름 수정
ctrl + b, $

#session 종료는 tmux에서 exit

#session 중단하기
ctrl + b, d

#session 목록 보기
tmux ls

#session 다시 시작
tmux attach -t <session-number or session-name>

#페이지 이동 
alt + up, down
#window 생성
ctrl + b, c

#window 이름 수정
ctrl + b, ,

#window 종료
ctrl + d

#window 이동
ctrl + b, 0-9 : window number
            n : next
            p : prev
            w : window selector
#pane 나누기
ctrl + b, % : 세로 분할
          " : 가로 분할
          
#pane 이동
ctrl + b, q : number
          o : 순서대로 이동

#pane 닫기
ctrl + d

#사이즈 조절
ctrl + b, :resize-pane -L,R,D,U 10
OR
ctrl + b, alt + 방향키

#레이아웃 변경
ctrl + b, spacebar

tmux conf 설정

set -g mouse on 						#마우스 사용
set-option -g history-limit 10000		#history 라인 10000
set-option -g default-shell /bin/zsh	#기본 bash zsh로 변경


참고

https://edykim.com/ko/post/tmux-introductory-series-summary/#copy-mode-sup-idfnref-2124-2a-hreffn-2124-21asup

Ctags란?

Ctags란 소스 파일에서 찾은 이름의 태그파일을 생성하는 도구입니다. 함수, 변수, 클래스 등을 인덱싱 하는데 사용할 수 있습니다. Ctags를 사용하면 vim과 같은 텍스트 편집기로 해당 함수를 빠르게 찾고 이동할 수 있습니다.


Ctags 설치

brew install ctags

brew를 이용해 ctags를 설치해 주도록 합니다.


Ctags 사용법

#현재 디렉토리와 하위 디렉토리의 모든 파일을 대상으로 tags 생성
ctags -R *

명령어 실행후 폴더에 tags파일이 생성된 것을 확인할 수 있습니다.


이제 vim으로 분석하고자 소스코드를 열어서 분석하고자 하는 함수위에 커서를 올려두고 'Ctrl + ]'를 누르면 함수로 이동하게 됩니다. 다시 원래있던 곳으로 돌아오기 위해선 'Ctrl + t'를 누르면 됩니다.


현재 ~/.config/nvim/init.vim파일에 Ctrl+] 를 F12로 매칭해서 사용되게 해놨습니다.

vi ~/.config/nvim/init.vim

#다음을 추가
" goto definition with F12
map <F12> <C-]>


Ctags 단축키

Tag Command 설명
Ctrl+] 함수가 정의된 위치로 이동,
Ctrl+t 이동하기 전 단계의 위치로 이동
:stj   Or   :sts 함수가 정의된 위치로 창을 수평 분할하여 이동
:tn 여러개의 함수 이름이 존재할 때 다음 함수로 점프
:tp 여러개의 함수 이름이 존재할 때 이전 함수로 점프
:tr 가장 처음에 찾았던 함수를 선택한다.
:tl 가장 마지막 함수를 선택한다.


참고

https://www.joinc.co.kr/w/Site/Development/Env/UsedCtag

"----------------------------------------------------------------------------------
"-- config
"----------------------------------------------------------------------------------
" set UTF-8 encoding
set enc=utf-8
set fenc=utf-8
set termencoding=utf-8

set hlsearch                    "highlight searching result
set ignorecase                  "ignore Case sensitive when searching
set history=1000                "store :cmd history
set relativenumber              "show relative number from current line
set cursorline                  "highlight cursor line
set mouse=h                     "Enable mouse in help mode
set wrap

syntax sync minlines=200        "For speed up vim
set clipboard=unnamed           "yank, paste to system clipboard


set nocompatible                " disable vi compatibility (emulation of old bugs)
set autoindent                  " use indentation of previous line
set smartindent                 " use intelligent indentation for C

" configure tabwidth and insert spaces instead of tabs
set tabstop=4                   " tab width is 4 spaces
set shiftwidth=4                " indent also with 4 spaces
set expandtab                   " expand tabs to spaces

" wrap lines at 120 chars. 80 is somewaht antiquated with nowadays displays.
set textwidth=120

" colorscheme wombat256
set t_Co=256

" turn syntax highlighting on
syntax on

set number                      " turn line numbers on
set showmatch                   " highlight matching braces

set comments=sl:/*,mb:\ *,elx:\ */      " intelligent comments

"----------------------------------------------------------------------------------
"-- keyboard mappings
"----------------------------------------------------------------------------------
" Keep undo history across sessions, by storing in file.
silent !mkdir ~/.config/nvim/backups > /dev/null 2>&1
set undodir=~/.config/nvim/backups
set undofile


"----------------------------------------------------------------------------------
"-- keyboard mappings
"----------------------------------------------------------------------------------
" switch between header/source with F4
map <F4> :e %:p:s,.h$,.X123X,:s,.cpp$,.h,:s,.X123X$,.cpp,<CR>
" goto definition with F12
map <F12> <C-]>


"----------------------------------------------------------------------------------
"-- plugins
"----------------------------------------------------------------------------------
call plug#begin('~/.config/nvim/plugged')
" Use release branch
Plug 'neoclide/coc.nvim', {'branch': 'release'}
" Or latest tag
Plug 'neoclide/coc.nvim', {'tag': '*', 'branch': 'release'}
" Or build from source code by use yarn: https://yarnpkg.com
Plug 'neoclide/coc.nvim', {'do': 'yarn install --frozen-lockfile'}
Plug 'nightsense/simplifysimplify'
Plug 'wakatime/vim-wakatime'            "check coding time
Plug 'scrooloose/nerdtree'
Plug 'jistr/vim-nerdtree-tabs'          "Toggle nerd tree with one key
Plug 'mattn/emmet-vim'                  "Trigger: <C-y><leader>
Plug 'jiangmiao/auto-pairs'             "Auto pair for ',), }, ]...
Plug 'airblade/vim-gitgutter'           "Show git status in vim
Plug 'ctrlpvim/ctrlp.vim'               "Ctrl + P for search file
Plug 'mhinz/vim-startify'               "fancy start page for empty vim
Plug 'iCyMind/NeoSolarized'

call plug#end()


"----------------------------------------------------------------------------------
"-- plugin config
"----------------------------------------------------------------------------------
" ----- NeoSolarized -----
"colorscheme NeoSolarized
"
set background=dark

"----- Nerd Tree -----
map nt <ESC>:NERDTreeToggle<CR>
"map nt <ESC>:NERDTree<CR>

일단 이렇게 쓰다가 추후 나에게 맞게 수정할 예정입니다.


https://seulcode.tistory.com/272 에서 많은 도움을 받았습니다.


My neovim settings: 나의 neovim 세팅을 공유합니다.

내가 vim 을 선호하는 가장 큰 이유 중 하나는 속도 이다. (간지라고는 말 못하니깐…) 그런데 최근 vim에 무분별하게 설치한 플러그인(…)때문에 속도가 조금 저하되는 문제가 발생하여 이것 저것 플러그인을 지..

seulcode.tistory.com


기존 리눅스 개발환경에서는 ctags와 vi만을 사용했었습니단 이번에 파이썬을 공부하면서 더 나은(?) 개발환경을 구축해야겠다고 생각했습니다.


원래 계획은 vim을 사용해서 개발환경을 구축할 계획이었지만 자료를 찾아보던중 vim보다는 neovim을 이용해 개발환경을 구축하는 것이 더 나을 것이라 생각이들었습니다.


neovim을 선택한 이유는 vim은 python 없이 vim을 컴파일 했을 경우 python을 사용하기 위해 다시 재컴파일 해야한다는 단점이 있었지만 neovim은 pip3 install neovim 처럼 불리된 형태로 설치할 수 있었기 때문입니다.(기존의 vim도 git에서 소스를 받아 python3옵션을 추가해 컴파일하면 python3를 사용가능합니다.)

또한 neovim은 버퍼로 터미널을 쓸수도 있다. [ :bel sp 50 | resize 10 | terminal ]


설치

brew install nvim
brew install cmake
brew install luarocks
brew install pkg-config

#nodeJs 설치
brew install node

#yarn 설치
brew install yarn

#vim-plug설치
curl -fLo ~/.local/share/nvim/site/autoload/plug.vim --create-dirs https://raw.githubusercontent.com/junegunn/vim-plug/master/plug.vim

pip3 install --user pynvim

neovim 설정 및 coc.nvim설치

환경파일 작성

mkdir -p ~/.config/nvim

cat > ~/.config/nvim/init.vim

"----------------------------------------------------------------------------------
"-- config
"----------------------------------------------------------------------------------
" set UTF-8 encoding
set enc=utf-8
set fenc=utf-8
set termencoding=utf-8

set hlsearch
set ignorecase

set nocompatible        " disable vi compatibility (emulation of old bugs)
set autoindent  " use indentation of previous line
set smartindent " use intelligent indentation for C

" configure tabwidth and insert spaces instead of tabs
set tabstop=4        " tab width is 4 spaces
set shiftwidth=4     " indent also with 4 spaces
set expandtab        " expand tabs to spaces
" wrap lines at 120 chars. 80 is somewaht antiquated with nowadays displays.
set textwidth=120
" turn syntax highlighting on
set t_Co=256
syntax on
" colorscheme wombat256
set number      " turn line numbers on
set showmatch   " highlight matching braces

set comments=sl:/*,mb:\ *,elx:\ */      " intelligent comments


"----------------------------------------------------------------------------------
"-- keyboard mappings
"----------------------------------------------------------------------------------
" switch between header/source with F4
map <F4> :e %:p:s,.h$,.X123X,:s,.cpp$,.h,:s,.X123X$,.cpp,<CR>
" goto definition with F12
map <F12> <C-]>


"----------------------------------------------------------------------------------
"-- plugins
"----------------------------------------------------------------------------------
call plug#begin('~/.config/nvim/plugged')
" Use release branch
Plug 'neoclide/coc.nvim', {'branch': 'release'}
" Or latest tag
Plug 'neoclide/coc.nvim', {'tag': '*', 'branch': 'release'}
" Or build from source code by use yarn: https://yarnpkg.com
Plug 'neoclide/coc.nvim', {'do': 'yarn install --frozen-lockfile'}
call plug#end()


"----------------------------------------------------------------------------------
"-- plugin config
"----------------------------------------------------------------------------------


설정파일 생성 후 플러그인 설치

nvim +PlugInstall

설치가 끝나면 이제  coc환경설정 파일을 만들어 주어야합니다.

#~/.config/nvim/coc-settings.json이 열립니다
nvim +CocConfig
{
  "languageserver": {
    "golang": {
      "command": "gopls",
      "rootPatterns": ["go.mod", ".vim/", ".git/", ".hg/"],
      "filetypes": ["go"]
    },
    "ccls": {
      "command": "ccls",
      "filetypes": ["c", "cpp", "objc", "objcpp"],
      "rootPatterns": [".ccls", "compile_commands.json", ".vim/", ".git/", ".hg/"],
      "initializationOptions": {
         "cache": {
           "directory": "/tmp/ccls"
         }
       }
    },
    "python": {
   "command": "python",
   "args": [
     "-mpyls",
     "-vv",
     "--log-file",
     "/tmp/lsp_python.log"
   ],
   "trace.server": "verbose",
   "filetypes": [
     "python"
   ],
   "settings": {
     "pyls": {
       "enable": true,
       "trace": {
         "server": "verbose"
       },
       "commandPath": "",
       "configurationSources": [
         "pycodestyle"
       ],
       "plugins": {
         "jedi_completion": {
           "enabled": true
         },
         "jedi_hover": {
           "enabled": true
         },
         "jedi_references": {
           "enabled": true
         },
         "jedi_signature_help": {
           "enabled": true
         },
         "jedi_symbols": {
           "enabled": true,
           "all_scopes": true
         },
         "mccabe": {
           "enabled": true,
           "threshold": 15
         },
         "preload": {
           "enabled": true
         },
         "pycodestyle": {
           "enabled": true
         },
         "pydocstyle": {
           "enabled": false,
           "match": "(?!test_).*\\.py",
           "matchDir": "[^\\.].*"
         },
         "pyflakes": {
           "enabled": true
         },
         "rope_completion": {
           "enabled": true
         },
         "yapf": {
           "enabled": true
        }
      }
    }
  }
}
  }
}

설정파일 저장후 nvim에서 :CocInstall coc-python 입력하면 설치가 완료된다.


참고

https://www.joinc.co.kr/w/man/12/neovim

https://yamoe.tistory.com/534

https://github.com/junegunn/vim-plug

'개발환경' 카테고리의 다른 글

Mac Os에서 ctags 설치 & 사용법  (0) 2020.02.09
.vimrc 파일 저장(수정중)  (0) 2020.02.09
Homebrew의 bundle로 Mac한번에 셋팅하기  (0) 2019.11.11
Homebrew Cask 설치하기  (0) 2019.11.11
MacOS에서 Homebrew 설치하기  (0) 2019.11.10

Classes and Methods Cheat Sheet

In the past few videos, we’ve seen how to define classes and methods in Python. Here, you’ll find a run-down of everything we’ve covered, so you can refer to it whenever you need a refresher.

Defining classes and methods


Classes and Instances

  • Classes define the behavior of all instances of a specific class.
  • Each variable of a specific class is an instance or object.
  • Objects can have attributes, which store information about the object.
  • You can make objects do work by calling their methods.
  • The first parameter of the methods (self) represents the current instance.
  • Methods are just like functions, but they can only be used through a class.

Special methods

  • Special methods start and end with __.
  • Special methods have specific names, like __init__ for the constructor or __str__ for the conversion to string.

Documenting classes, methods and functions

  • You can add documentation to classes, methods, and functions by using docstrings right after the definition. Like this:


출처 : google crash course on python 강의

Dictionary Methods Cheat Sheet

Definition

x = {key1:value1, key2:value2}

Operations

  • len(dictionary) - Returns the number of items in the dictionary
  • for key in dictionary - Iterates over each key in the dictionary
  • for key, value in dictionary.items() - Iterates over each key,value pair in the dictionary
  • if key in dictionary - Checks whether the key is in the dictionary
  • dictionary[key] - Accesses the item with key key of the dictionary
  • dictionary[key] = value - Sets the value associated with key
  • del dictionary[key] - Removes the item with key key from the dictionary

Methods

  • dict.get(key, default) - Returns the element corresponding to key, or default if it's not present
  • dict.keys() - Returns a sequence containing the keys in the dictionary
  • dict.values() - Returns a sequence containing the values in the dictionary
  • dict.update(other_dictionary) - Updates the dictionary with the items coming from the other dictionary. Existing entries will be replaced; new entries will be added.
  • dict.clear() - Removes all the items of the dictionary

Check out the official documentation for dictionary operations and methods.


https://docs.python.org/3/library/stdtypes.html#mapping-types-dict


Built-in Types — Python 3.8.1 documentation

The following sections describe the standard types that are built into the interpreter. The principal built-in types are numerics, sequences, mappings, classes, instances and exceptions. Some collection classes are mutable. The methods that add, subtract,

docs.python.org


출처 : google crash course on python 강의

Lists and Tuples Operations Cheat Sheet

Lists and tuples are both sequences, so they share a number of sequence operations. But, because lists are mutable, there are also a number of methods specific just to lists. This cheat sheet gives you a run down of the common operations first, and the list-specific operations second.

Common sequence operations

  • len(sequence) Returns the length of the sequence
  • for element in sequence Iterates over each element in the sequence
  • if element in sequence Checks whether the element is part of the sequence
  • sequence[i] Accesses the element at index i of the sequence, starting at zero
  • sequence[i:j] Accesses a slice starting at index i, ending at index j-1. If i is omitted, it's 0 by default. If j is omitted, it's len(sequence) by default.
  • for index, element in enumerate(sequence) Iterates over both the indexes and the elements in the sequence at the same time

Check out the official documentation for sequence operations.

List-specific operations and methods

  • list[i] = x Replaces the element at index i with x
  • list.append(x) Inserts x at the end of the list
  • list.insert(i, x) Inserts x at index i
  • list.pop(i) Returns the element a index i, also removing it from the list. If i is omitted, the last element is returned and removed.
  • list.remove(x) Removes the first occurrence of x in the list
  • list.sort() Sorts the items in the list
  • list.reverse() Reverses the order of items of the list
  • list.clear() Removes all the items of the list
  • list.copy() Creates a copy of the list
  • list.extend(other_list) Appends all the elements of other_list at the end of list

Most of these methods come from the fact that lists are mutable sequences. For more info, see the official documentation for mutable sequences and the list specific documentation.

List comprehension

  • [expression for variable in sequence] Creates a new list based on the given sequence. Each element is the result of the given expression.
  • [expression for variable in sequence if condition] Creates a new list based on the given sequence. Each element is the result of the given expression; elements only get added if the condition is true.

출처 : google crash course on python 강의

Formatting Strings Cheat Sheet

Python offers different ways to format strings. In the video, we explained the format() method. In this reading, we'll highlight three different ways of formatting strings. For this course you only need to know the format() method. But on the internet, you might find any of the three, so it's a good idea to know that the others exist.

Using the format() method

"base string with {} placeholders".format(variables)

The format method returns a copy of the string where the {} placeholders have been replaced with the values of the variables. These variables are converted to strings if they weren't strings already. Empty placeholders are replaced by the variables passed to format in the same order.

"{0} {1}".format(first, second)

If the placeholders indicate a number, they’re replaced by the variable corresponding to that order (starting at zero).

"{var1} {var2}".format(var1=value1, var2=value2)

If the placeholders indicate a field name, they’re replaced by the variable corresponding to that field name. This means that parameters to format need to be passed indicating the field name.

"{:exp1} {:exp2}".format(value1, value2)

If the placeholders include a colon, what comes after the colon is a formatting expression. See below for the expression reference.

Official documentation for the format string syntax

Formatting expressions

ExprMeaningExample

{:d} integer value '{:d}'.format(10.5) → '10'
{:.2f} floating point with that many decimals '{:.2f}'.format(0.5) → '0.50'
{:.2s} string with that many characters '{:.2s}'.format('Python') → 'Py'
{:<6s} string aligned to the left that many spaces '{:<6s}'.format('Py') → 'Py    '
{:>6s} string aligned to the right that many spaces '{:<6s}'.format('Py') → '    Py'
{:^6s} string centered in that many spaces '{:<6s}'.format('Py') → '  Py '

Check out the official documentation for all available expressions.

Old string formatting (Optional)

The format() method was introduced in Python 2.6. Before that, the % (modulo) operator could be used to get a similar result. While this method is no longer recommended for new code, you might come across it in someone else's code. This is what it looks like:

"base string with %s placeholder" % variable

The % (modulo) operator returns a copy of the string where the placeholders indicated by %  followed by a formatting expression are replaced by the variables after the operator.

"base string with %d and %d placeholders" % (value1, value2)

To replace more than one value, the values need to be written between parentheses. The formatting expression needs to match the value type.

"%(var1) %(var2)" % {var1:value1, var2:value2}

Variables can be replaced by name using a dictionary syntax (we’ll learn about dictionaries in an upcoming video).

"Item: %s - Amount: %d - Price: %.2f" % (item, amount, price)

The formatting expressions are mostly the same as those of the format() method. 

Check out the official documentation for old string formatting.

Formatted string literals (Optional)

This feature was added in Python 3.6 and isn’t used a lot yet. Again, it's included here in case you run into it in the future, but it's not needed for this or any upcoming courses.

A formatted string literal or f-string is a string that starts with 'f' or 'F' before the quotes. These strings might contain {} placeholders using expressions like the ones used for format method strings.

The important difference with the format method is that it takes the value of the variables from the current context, instead of taking the values from parameters.

Examples:

>>> name = "Micah"

>>> print(f'Hello {name}')

Hello Micah

>>> item = "Purple Cup"

>>> amount = 5

>>> price = amount * 3.25

>>> print(f'Item: {item} - Amount: {amount} - Price: {price:.2f}')

Item: Purple Cup - Amount: 5 - Price: 16.25

Check out the official documentation for f-strings.


출처 : google crash course on python 강의